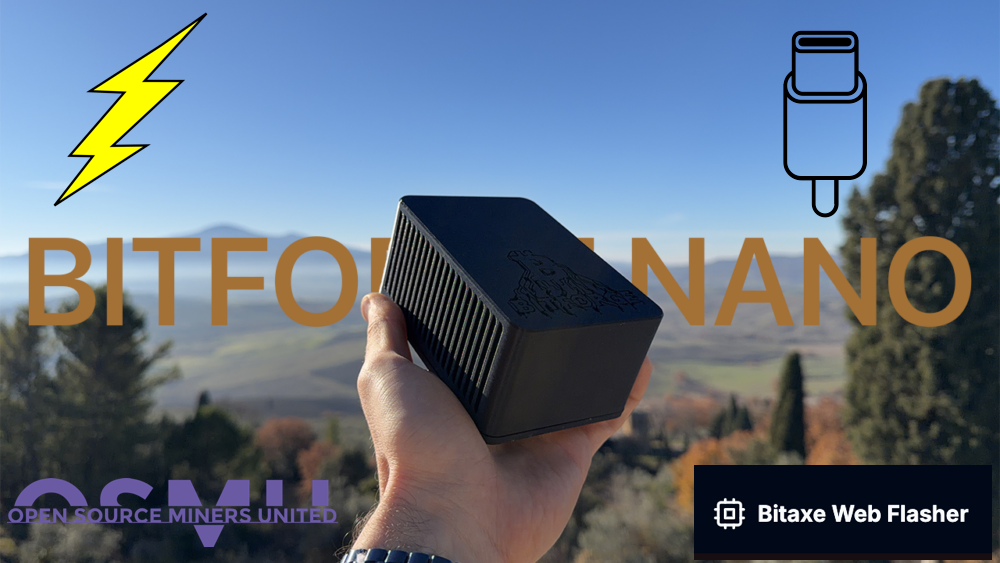
What Is the Bitaxe Web Flasher?
The Bitaxe Web Flasher is a browser-based tool that lets you install or update firmware on your Bitaxe mining device without downloading any software. You just plug in your device, visit the site, and flash directly from the page. That’s it. No drivers, no terminal, no setup headaches.
It lives at bitaxeorg.github.io/bitaxe-web-flasher and supports several Bitaxe models, including the BitForge Nano.
If your BitForge Nano is acting up, won’t connect, seems bricked, or you accidentally flashed the wrong firmware, this tool is your best friend. A lot of issues that look fatal at first, like a device that appears completely dead on arrival or one that got stuck after a bad flash, can actually be fixed with a clean reflash. The web flasher is one of the first things you should try before giving up on a device. It solves a surprising number of problems.
What You Need Before Starting
Before anything else, make sure you have these two things ready:
- A Bitforge Nano (of course).
- 👉 Get the Bitforge Nano with BTC or Fiat on the DTV Electronics Store (Worldwide Shipping) 🌍
- A USB-C data cable. Not a charge-only cable. It needs to support data transfer, otherwise your computer won’t be able to see the device at all.
- A power connector for the BitForge Nano. The device needs to be powered on during the flashing process. USB alone won’t power it, so make sure it’s connected to its power source before you begin.
Step 1: Connect Your Device
To get started, visit the official website of the Bitaxe Web Flasher.
Plug your BitForge Nano into your computer via the USB-C data cable, and make sure it’s also connected to its power supply, so you know it’s turned on. Then head to the Bitaxe Web Flasher site and click Connect.
Note: You will have to remove the case, as the USB-C connector is not accessible from the outside.
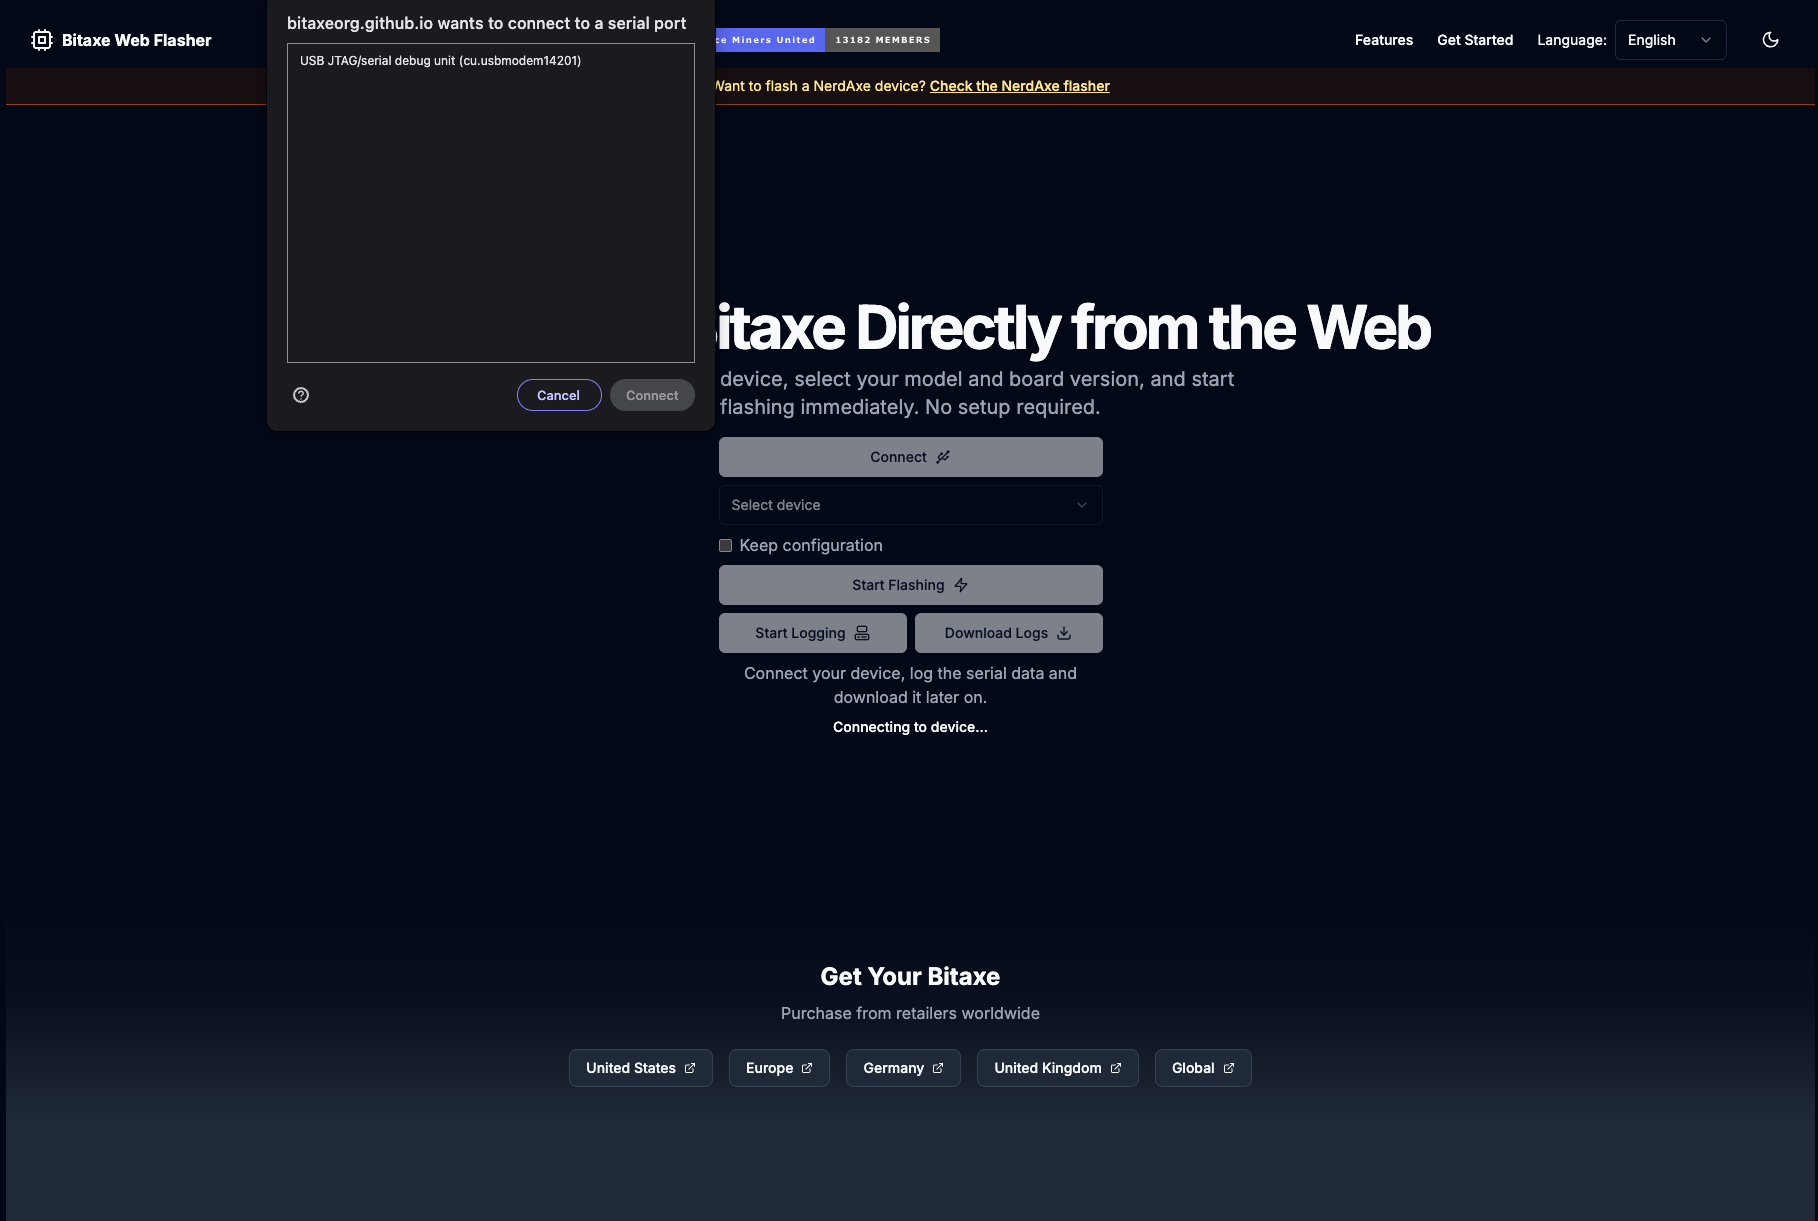
A browser popup will appear asking permission to connect to a serial port. You should see your device listed, something like USB JTAG/serial debug unit (cu.usbmodem14201). Select it and click Connect.
The button on the page will change to Disconnect once the connection is successful. That means you’re in.
Step 2: Select Your Device Model
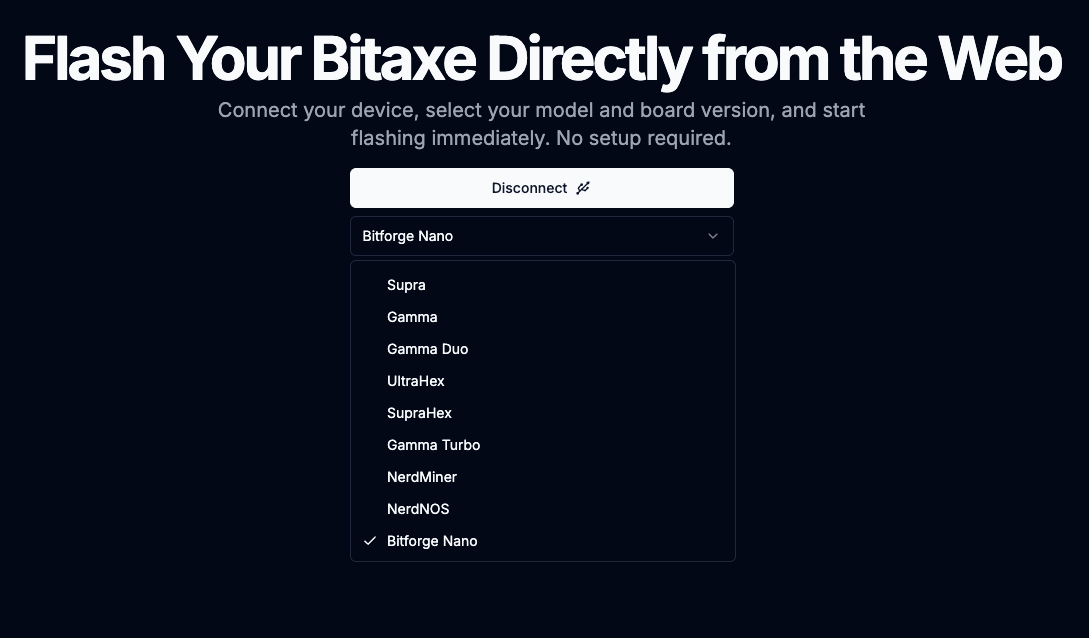
Once connected, a dropdown menu appears. Click it and select Bitforge Nano from the list. The flasher supports a range of devices like Supra, Gamma, UltraHex, and others, so just make sure you pick the right one for your hardware.
Step 3: Choose Your Firmware Version
Two more dropdowns will appear after selecting your model. These let you pick the model number (for example, 800) and the firmware version (for example, 1.1). Match these to your actual hardware if you know the specs. When in doubt, the defaults are usually a safe starting point.
Step 4: Keep Configuration (Optional)
There’s a checkbox labeled Keep configuration. Check this if you want to preserve your existing mining settings like your pool, wallet address, and Wi-Fi credentials after flashing. If you’re doing a clean install or troubleshooting, leave it unchecked.
Step 5: Start Flashing
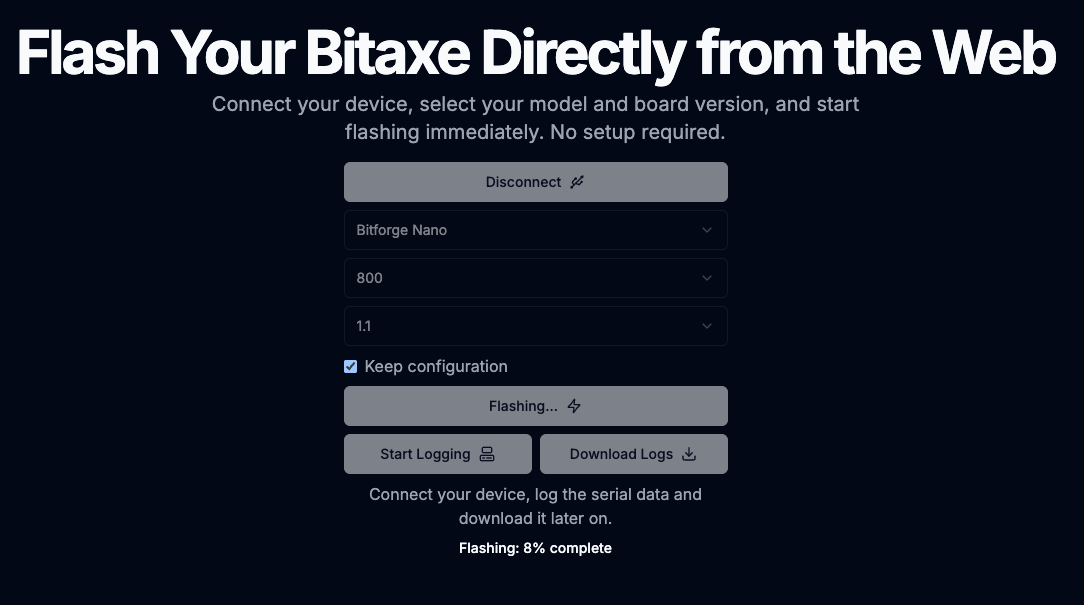
Click Start Flashing. The button will grey out and show Flashing… with a progress indicator at the bottom of the page. You’ll see something like Flashing: 8% complete ticking upward.
Don’t unplug the device during this process. Just let it run.
Step 6: Done
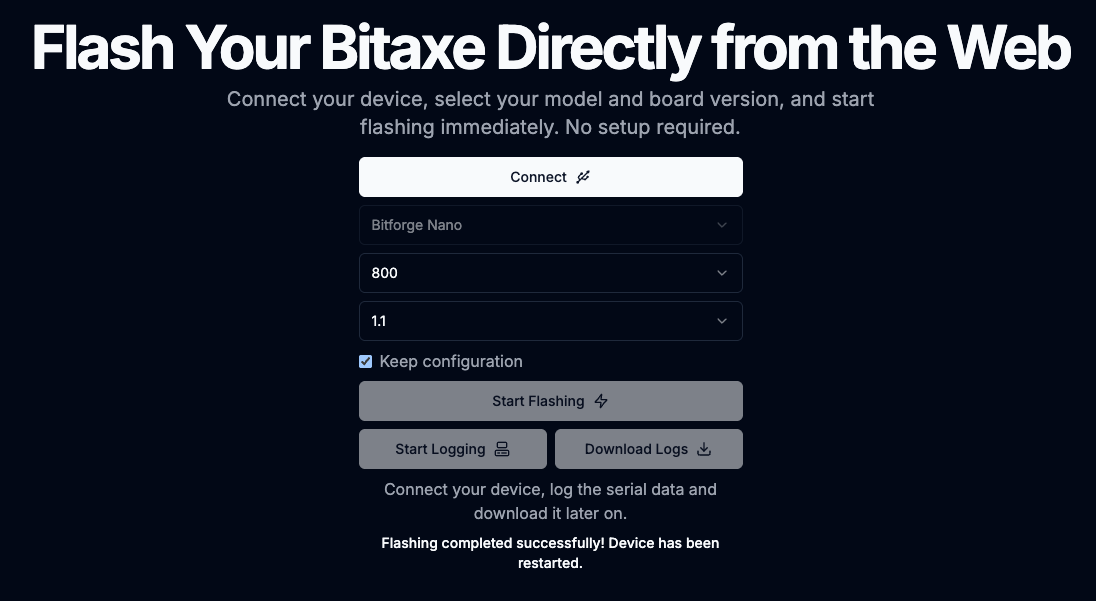
Once it finishes, the page will show Flashing completed successfully! Device has been restarted. The Connect button reappears, and your BitForge Nano is now running the new firmware.
Reconnect to your miner’s web interface to verify everything looks right, and you’re good to go.
👉 Get the Bitforge Nano with BTC or Fiat on the DTV Electronics Store (Worldwide Shipping) 🌍